Callflow Guide
Introduction to Custom Callflows
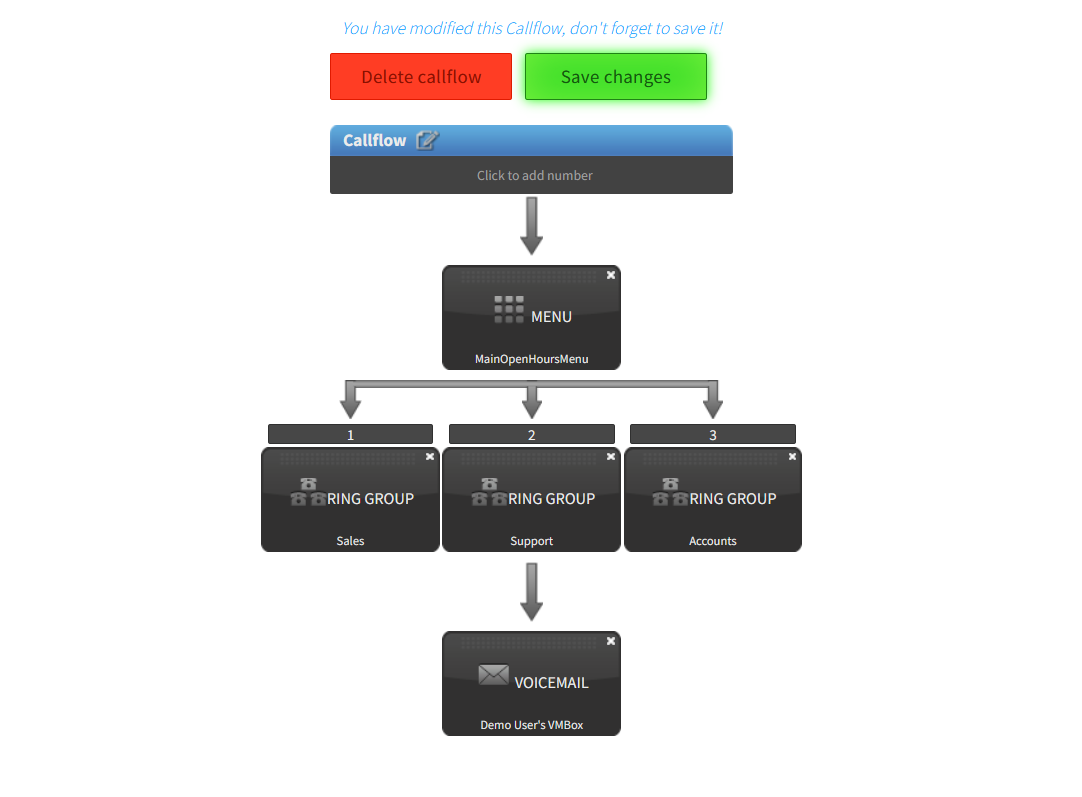
Custom Callflows is an advanced feature that provides a graphical user interface for designing complex and customized call routing plans. It complements the basic call routing configurations available in the PacketSky Voice SmartPBX app. Here are some user scenarios to illustrate its capabilities:
Example Scenarios
- Multiple Locations Management:
- Set up unique office hours and holiday schedules.
- Create custom answering messages based on the incoming call source and time of day.
- Design multi-level menus (e.g., “press 1 for support, then 2 for apps, and 3 for service issues”).
- Custom Call Sequences:
- Tailor call routing based on unique variables like phone numbers, holidays, etc.
Getting Started
Before you begin setting up custom callflows, ensure your settings in SmartPBX are up-to-date. This verification guarantees that you have the latest fields and settings configured for your account.
It’s essential to understand that the Custom Callflows feature interacts with multiple applications and settings. Therefore, the manager responsible for configuring callflows should have a comprehensive understanding of how these applications work together and the potential ripple effects of any changes.
Accessing Custom Callflows
To access the Custom Callflows feature:
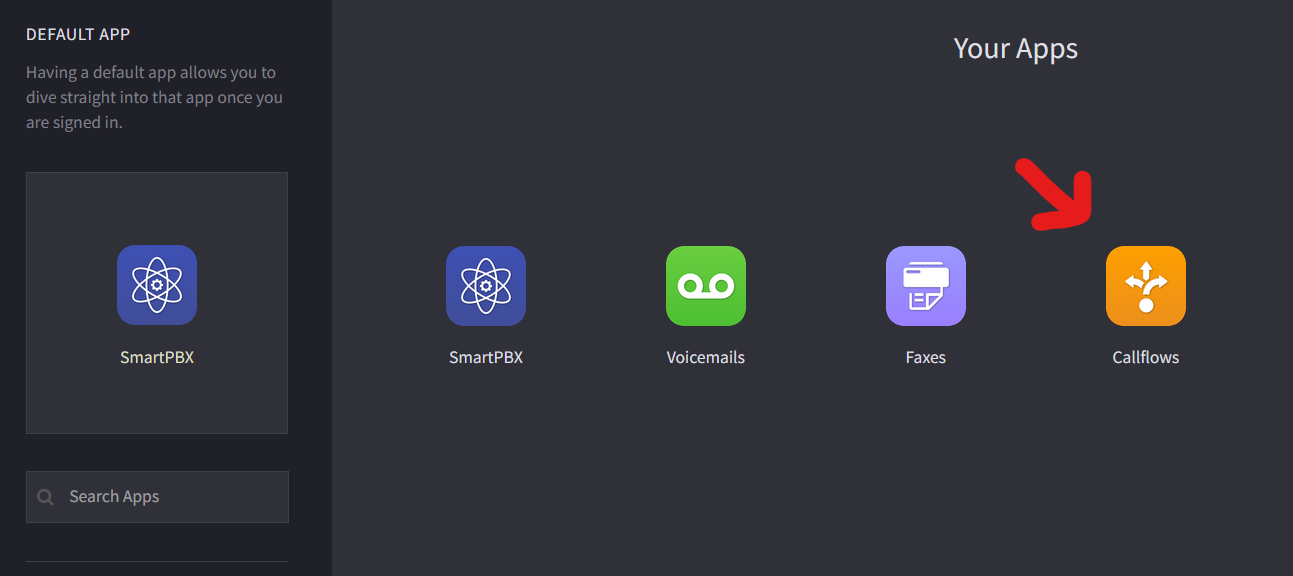
- Log in to SmartPBX:
- Navigate to the applications menu and select Custom Callflows.
- Finding Custom Callflows:
- If Custom Callflows is not displayed, try searching for it in the Search Apps field.
- Alternatively, select the App Exchange button, locate Custom Callflows, and enable it using the toggle.
- If you still cannot find it, contact your system administrator for assistance.
By leveraging the Custom Callflows feature, businesses can create intricate and highly customized call routing plans to enhance their communication strategy and improve overall efficiency.
Navigating Your Callflows Dashboard
The Callflows dashboard serves as the central hub for creating and managing your custom callflows. The main Callflows selection brings you to the home screen where you can build and edit callflows. Here’s an overview of the dashboard and its features:
- Main Callflows Selection:
- Click this to access the home screen for building and managing callflows.
- Attribute Selections:
- Smaller selections allow you to define specific attributes for each callflow.
- You can access these attributes either from the dashboard or by selecting Edit / Advanced options within a specific callflow.
This intuitive interface allows you to efficiently create, modify, and manage callflows to suit your business needs.
Creating a Custom Callflow
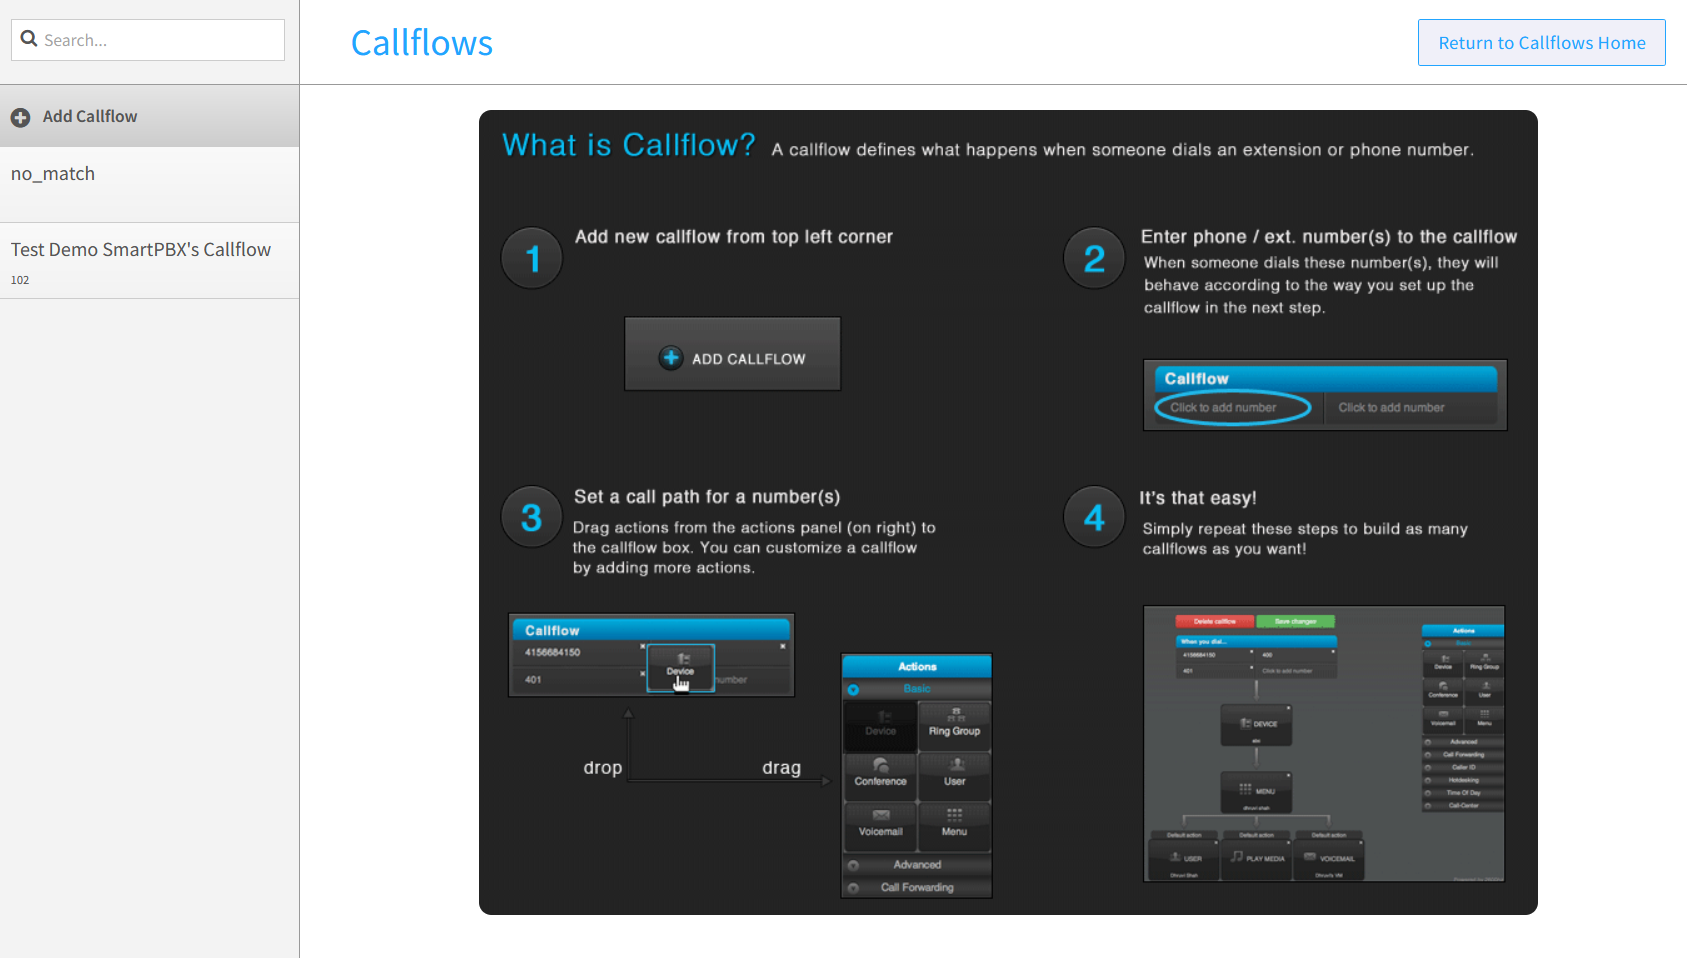
When you click on Callflows, you will be guided through a brief tutorial on creating a new callflow. On the left, you’ll see a list of existing callflows assigned to your account and an option to add a new one.
Steps to Create a Callflow:
- Add a Callflow:
- Select the “Add Callflow” button to create a new callflow.
- Enter Phone Number / Extension:
- Assign a phone number or extension to the callflow.
- Drag and Drop Actions:
- Drag your desired actions from the menu and drop them into the diagram to build your callflow.
- Save Changes:
- Once you’ve set up your actions, save your changes to activate the callflow.
Detailed Steps for Creating a Custom Callflow
Adding a Callflow
- Select the Add Callflow Button:
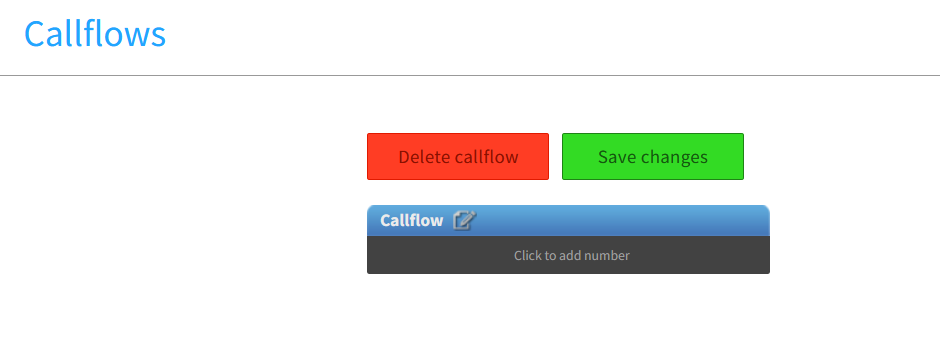
- In the left menu bar, select the “Add Callflow” button. You will see a blank screen waiting to be filled, with the Actions menu on the right.
- Assign a Number to Your Callflow:
- Click the black bar to assign a number to your callflow.
- If you want to edit an existing callflow, select the edit pencil icon in the upper right of the blue bar.
- Choose a Number or Extension:
- Select either a phone number in your account (you can also purchase one), an existing extension shown in the dropdown, or enter a new extension.
- Display Your Selection:
- Your chosen number or extension will display in the black title bar. You are now ready to add actions to your callflow.
Important Notes:
- Minimum One Action: Your callflow cannot be saved until you add at least one action.
- Naming Your Callflow: When first saved, your callflow will display its name as the first extension number you have entered. To change the name, select the edit icon at the top right of the blue callflow bar. Enter a unique name and decide if you want it displayed as a contact and in SmartPBX’s main number list options.
Adding Actions to Your Callflow
Reviewing the Actions Menu
- Access the Actions Menu:
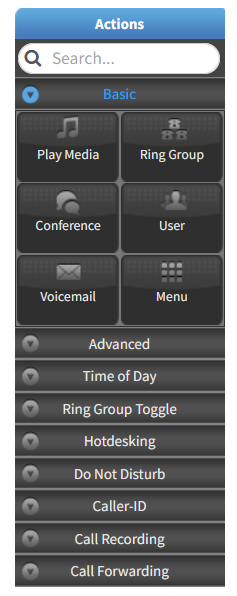
- On the right menu bar, you’ll see the Actions menu. The Basic Menu, displaying the most popular actions, is open by default.
- Viewing Additional Actions:
- To view additional available actions, click on the dropdown arrow of the eight additional topics.
Using the Actions Menu
- Drag and Drop Actions:
- Drag the desired actions from the menu to your “palette” in the order you want the callflow to follow.
- Drop each action onto the last identified action, and it will connect below.
- Entering Action Details:
- Depending on the action you choose, you may need to enter additional information in a dialog box that pops up.
- Some actions trigger dual dialog boxes. For example, the “Menu” action allows you to enter several menu items.
- Ensure you save each dialog box entry.
- Managing Actions:
- To remove a block, click on the “x” at the top right of the action block.
- Refer to the earlier notes on how to name your callflow and other settings.
Available Actions for Callflows
Here is an overview of all the possible actions you can use to create custom callflows in PacketSky Voice SmartPBX, organized by category.
Basic Actions
- Play Media
- Function: Play an audio file such as a greeting.
- Settings: You can create, upload, or use Text-to-Speech files. Assign a Persona for TTS voice and set stream options to customize how the message is delivered.
- Ring Group
- Function: Assign users, devices, and groups to a ring group.
- Settings: Configure ring strategy (concurrent or sequential), set a ringback destination, and determine the number of times to ring members before the call is routed elsewhere.
- Conference
- Function: Connect caller to a conference call.
- Settings: Set the conference name, extension, PIN numbers, and join/exit tones. You can also enable video conferencing for enhanced collaboration.
- User
- Function: Connect a call to a user.
- Settings: Define the number of rings before moving on, set email notifications for voicemails, configure inbound/outbound Caller ID, and assign devices to the user.
- Voicemail
- Function: Direct a caller to leave a voicemail message.
- Settings: Assign a mailbox and configure advanced settings such as auto-login and usage options to streamline access and management.
- Menu
- Function: Ask a caller to select a menu option or dial an extension.
- Settings: Set up initial and advanced options to guide callers through menu selections, making it easier for them to reach the correct department or service.
Advanced Actions
- Device
- Function: Ring a cell phone, VoIP phone, or other device.
- Settings: Specify the device settings for call routing to ensure the call reaches the intended device.
- Callflow
- Function: Transfer a call to another saved callflow.
- Settings: Select the target callflow from your saved callflows to redirect the call appropriately.
- Page Group
- Function: Page or ring several VoIP or cell groups.
- Settings: Configure the audio to be one or two-way, and add users, devices, or groups to the page group for efficient communication.
- Missed Call Alert
- Function: Send email notifications for unanswered inbound calls that do not result in a voicemail message.
- Settings: Enter a list of email addresses or select users to receive notifications, ensuring that missed calls are promptly addressed.
- Manual Presence
- Function: Manage user presence manually.
- Settings: Set the presence status (e.g., available, away) to reflect the user’s current availability.
- Text to Speech (TTS)
- Function: Convert entered text to speech.
- Settings: Choose the voice and language for the text-to-speech conversion to ensure clear and accurate message delivery.
- Sleep
- Function: Set a pause before the next action.
- Settings: Define the length of the pause in seconds to control the timing between actions in the callflow.
- Language
- Function: Assign a language for the callflow.
- Settings: Configure language-specific settings to accommodate multilingual callers.
- Group Pickup
- Function: Set group pickup feature for a user, group, or device.
- Settings: Configure the group pickup parameters to allow users to answer calls for the group.
- Receive Fax
- Function: Send a fax to a specific user.
- Settings: Enable T.38 for reliable faxing over IP and specify the recipient.
- Pivot
- Function: Enable a pivot routine for dynamic call routing based on external data.
- Settings: Integrate with third-party servers to route calls dynamically based on real-time data.
- DISA
- Function: Allow outbound calls to be made from an external source as if coming from the business account.
- Settings: Configure PIN, retries, interdigit time, max digits, preconnect audio, and Caller ID options for secure and flexible outbound calling.
- Collect DTMF
- Function: Collect DTMF inputs for following steps.
- Settings: Set timeouts, max digits, terminator key, and collection name to capture caller inputs accurately.
- Response
- Function: Return a custom SIP error code for troubleshooting or announcing errors to callers.
- Settings: Configure the media to be played when an error occurs, providing clear guidance to callers.
- Conference Service
- Function: Transfer the caller to the conference call service, asks for conference number and PIN.
- Settings: Set up the conference details and tones to ensure secure and orderly conference access.
- Check Voicemail
- Function: Check a group or personal voicemail.
- Settings: Configure voicemail access options to retrieve messages conveniently.
- Fax Boxes
- Function: Connect to a fax box.
- Settings: Set up the fax box settings to receive and manage faxes.
- Global Carrier
- Function: Route calls to the phone network through pre-configured service providers.
- Settings: Configure carrier routing for efficient call handling.
- Account Carrier
- Function: Route calls to the phone network through a configured SIP provider, Google Voice, or a physical line.
- Settings: Set up account carrier options for diverse call routing needs.
- Directory
- Function: Ask callers to enter the first three letters of the person they’re trying to reach.
- Settings: Assign directory, configure input rules, and sort options for easy caller navigation.
Time of Day Actions
- Time of Day
- Function: Set actions based on the time of day.
- Settings: Select timezone and configure rules for time-based actions to automate call routing.
- Disable Time of Day
- Function: Disable time of day rules.
- Settings: Temporarily suspend time of day routing rules.
- Enable Time of Day
- Function: Enable time of day rules.
- Settings: Activate time of day routing rules as needed.
- Reset Time of Day
- Function: Reset time of day settings.
- Settings: Clear and reset time of day rules to default.
Ring Group Toggle Actions
- Ring Group Login
- Function: Allow caller to log in to ring groups dynamically.
- Settings: Configure login parameters for dynamic ring group management.
- Ring Group Logout
- Function: Allow caller to log out of ring groups dynamically.
- Settings: Configure logout parameters for dynamic ring group management.
Do Not Disturb (DND) Actions
- Activate Do Not Disturb
- Function: Activate Do Not Disturb status.
- Settings: Set DND status to prevent interruptions.
- Deactivate Do Not Disturb
- Function: Deactivate Do Not Disturb status.
- Settings: Clear DND status to resume normal call handling.
- Toggle Do Not Disturb
- Function: Toggle Do Not Disturb status.
- Settings: Switch DND status on or off as needed.
Caller ID Actions
- Dynamic CID
- Function: Set your caller ID dynamically.
- Settings: Configure caller ID settings to display different numbers as needed.
- Prepend
- Function: Add text in front of your caller ID.
- Settings: Customize caller ID display with additional text.
- Reset Prepend
- Function: Reset all prepended text before the caller ID.
- Settings: Clear any prepended text for a clean caller ID display.
Call Recording Actions
- Start Call Recording
- Function: Start call recording.
- Settings: Initiate recording for quality and compliance purposes.
- Stop Call Recording
- Function: Stop call recording.
- Settings: End recording and save the recorded data.
Call Forwarding Actions
- Enable Call Forwarding
- Function: Enable call forwarding.
- Settings: Activate forwarding to another number or device.
- Disable Call Forwarding
- Function: Disable call forwarding.
- Settings: Deactivate forwarding to stop redirecting calls.
- Update Call Forwarding
- Function: Update call forwarding settings.
- Settings: Modify forwarding details for accurate call routing.
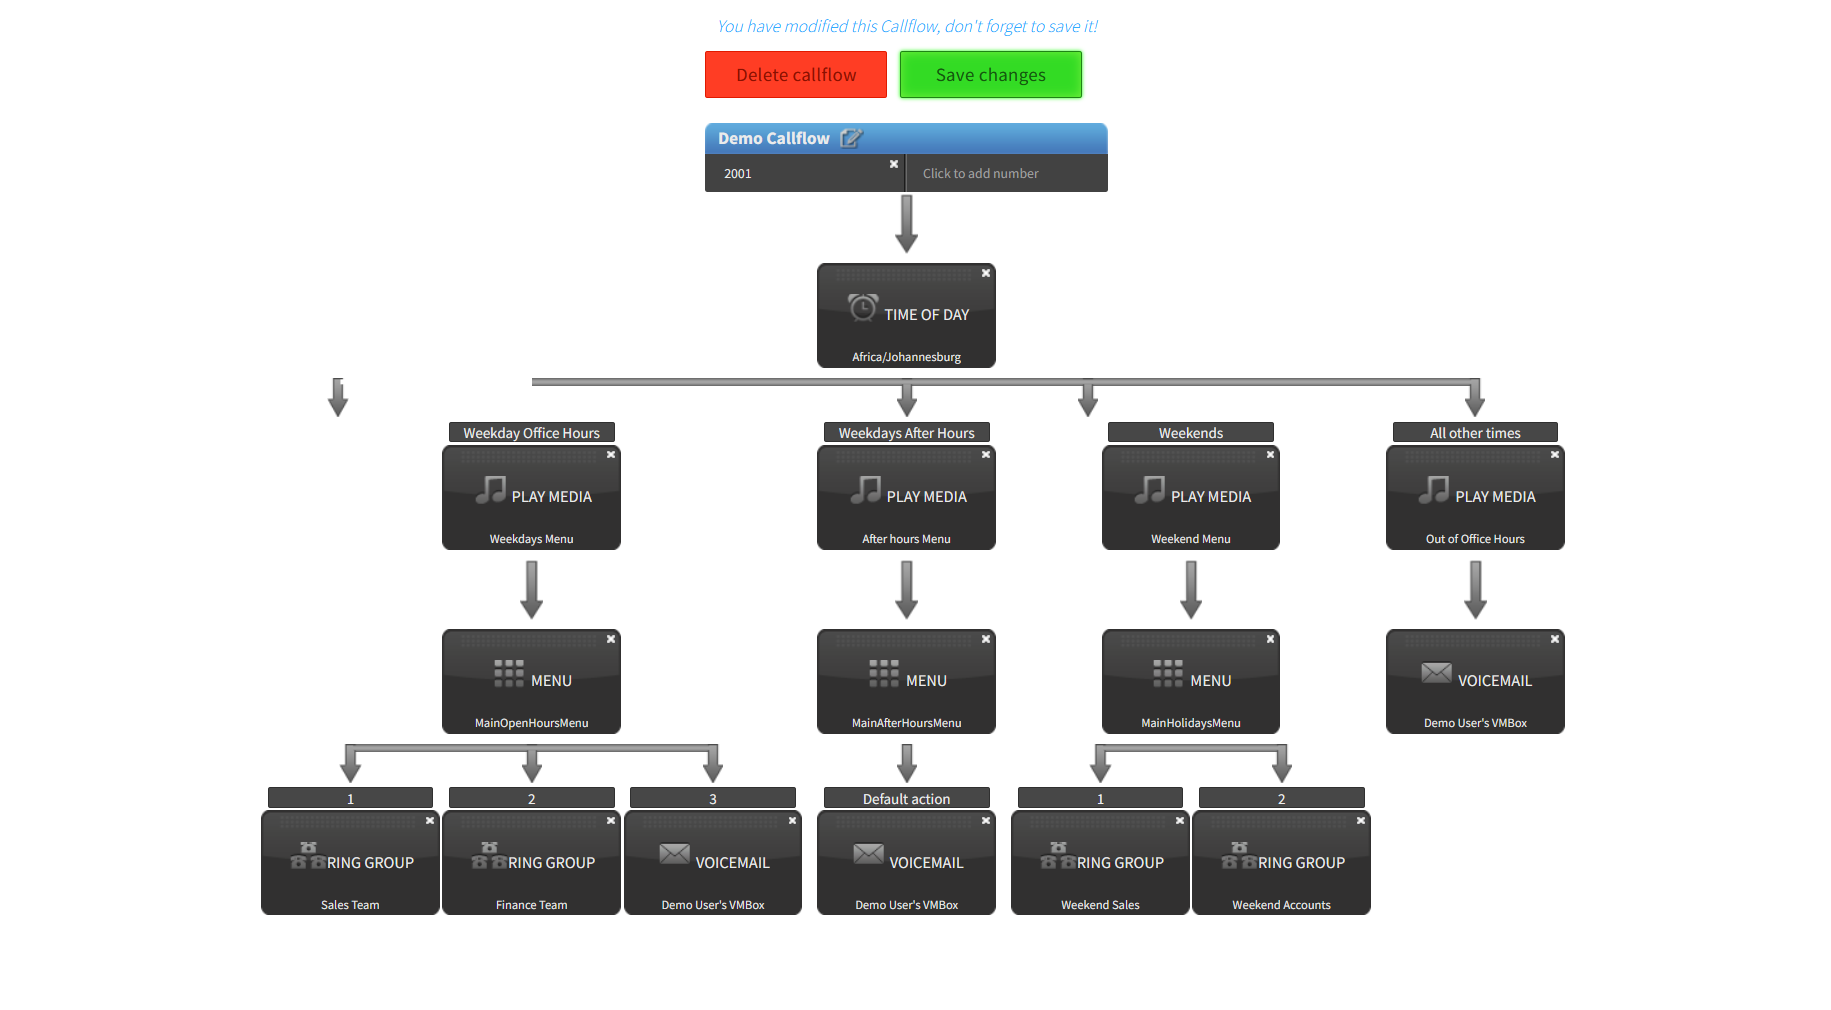
Advanced Callflow Example
Here is an example of a callflow using only Advanced actions.

